The Background
I've had an... "interesting" summer, which has kept me both busy and away from my sewing machine. There have been many lovely things (shopping with my future DIL for her wedding dress), and some not-so-lovely (dealing with my sister's dementia and getting her into a safe place). But hey! Life. Is. Amiright? And life continues apace.
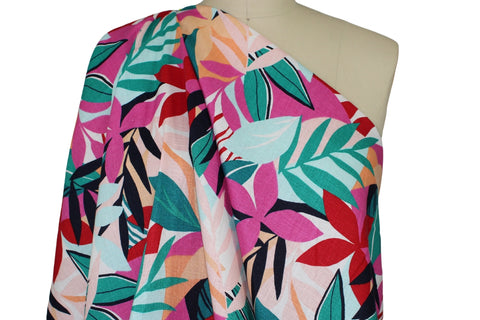
On a tangential note, I'm running a fundraiser in August, 2023 for the Maui Strong Fund to benefit the communities devastated by the wildfires on Maui last month. 50% of sales of fabrics in the Tori Richard Benefit category go to the fund. Even if you didn't have the chance to take part in the fundraiser, I encourage you to give to the fund, which distributes 100% of donations to people affected. I added a lot of fabrics to the site in August, and the one that grabbed my attention right away was Pele's Garden ITY Jersey.
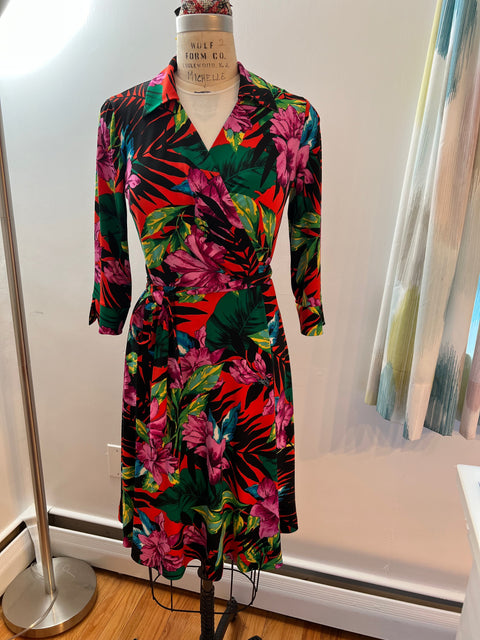
This fabric is included in the fundraiser, and I fell in love at first sight. I knew right away that I wanted this for a wrap dress, and I pulled my TNT pattern, the now out of print (Dang you, Simplicity! Dang you straight to heck!) DVF inspired Vogue V8379. I have made this dress several times, and I also teach a video class with (the incomparable) Susan Khalje on making a wrap dress, using this pattern as the base.
Pattern Modifications
As I mentioned, I've made this pattern a number of times. I start with a size 12 at the shoulders, and taper out to a size 14 at the side seam. I did an FBA:

I don't use the order of construction of the pattern. Instead, I make the bodice first (including the sleeve, which I flat set to the bodice).


I serged most of the seams (there were a few I ran on the sewing machine).

A Neat Hemming Trick
Now, if you read the instructions, they tell you to run a basting stitch along the raw edge of the hem. They then have you turn up the hem and then pull that basting stitch so the raw edge eases in.
Well, yeah, you can do that. And it will work, or maybe it'll give you some puckers and make it look really wonky. Ask me how I know. I have a different method, that I've found works really well for knits.
Pin the hem about every 4 inches or so. Leave the pins in the fabric and press lightly along the hemline with steam (don't worry about the raw edge, we'll get to that).
Leaving the pins in, position the hem under the presser foot, with the folded edge to the right of the presser foot. Start stitching, and as you go, stretch the folded edge of the fabric slightly, making a slight curve as you sew. By stretching the folded edge, you automatically ease the raw edge into the curve. It's just geometry, and it works!

Go slowly, and adjust the curve as you pull the pins out of the fabric. Practice on a scrap of fabric, but I think you'll like this method. In this case, I basted the hem as a guide, then went back over it with my cover stitch.

Conclusion
So there you have it! This is a great pattern, and I love making and wearing it. I REALLY love this fabric. So I hope this gives you some information and inspiration.
Happy sewing!
Ann